
I recently retired from teaching, and some of my favorite memories are from my extra curricular musicals. Costumes and sets were the only variables I could control well, so I was determined to make those outstanding.
The benefits were many, and my artistic skills improved over the years. The students looked fabulous and were empowered, and the teamwork toward something excellent developed memorable relationships between us all.
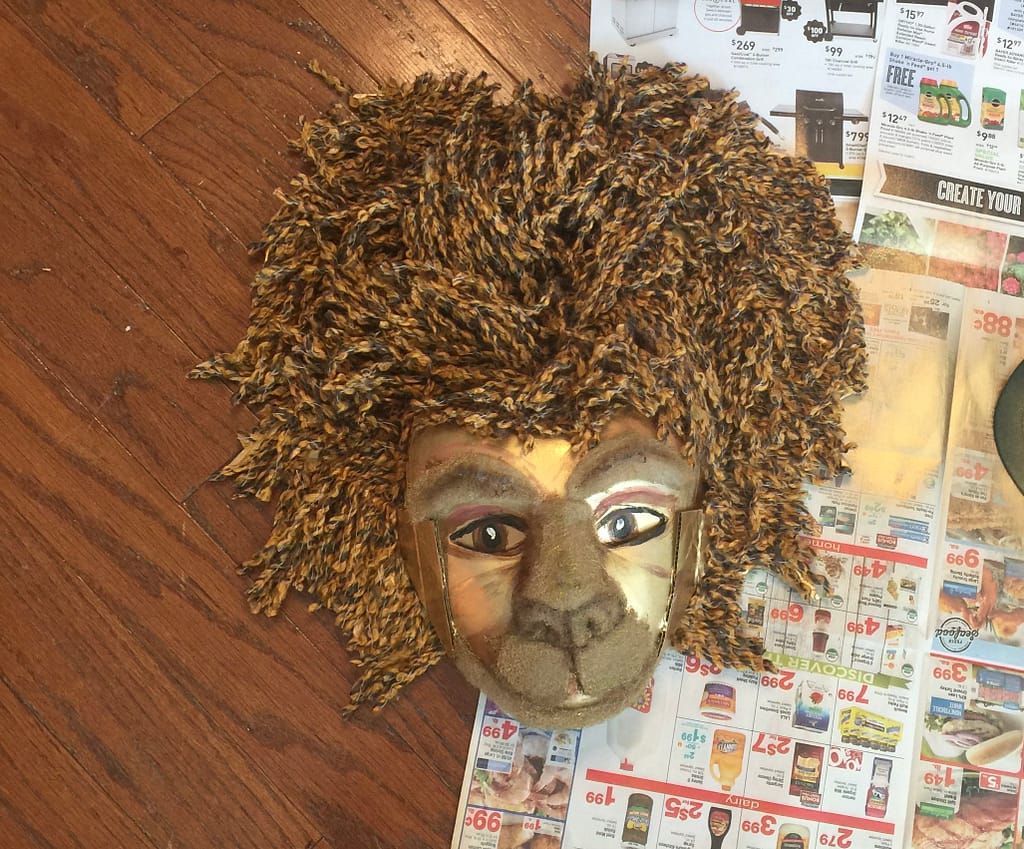
One of the musicals was “Lion King, Jr.” I had already made a lion door knocker for “A Christmas Carol,” so I cranked these Lions out fairly quickly. They were attached to the back of adjustable baseball hats and worn on the top of their heads. Best of all, (and why I have the courage to post here) they held up through all kinds of 5th and 6th grade wear, and looked fabulous. Here are the steps I took to create the masks:
Step 1. Choose Inspirational Photos
There are many online photos of the Lion King Characters, and they’re easy to find. I looked at many, decided what I could possibly do, and used a variety of ideas. I can’t find any saved photos of those I used as an inspiration, because this was a compilation.
Step 2. Gather Materials
Collect materials.
- Plain Masks from the arts and crafts section of a discount store onto which you will glue materials.
- Hot glue gun and glue sticks
- Scraps of cardboard, foam board.
- Fabric batting I found that the batting creates a great, fur-type texture
- Scissors
- Paints-spray and acrylic
- Baseball hats (I bought mine at the dollar store.)
- Yarn for the manes


Step 3.
Cut & Glue
- Cut out shapes to cover the eye holes in the masks.
- For Mufasa and Scar, add large shapes to the tops, sides and backs of the masks to create a “bigger” stage presence. For Scar, I added sharp spikes, for Mufasa, a large impressive mane-shape. I added additional cardboard to both of these characters on the sides.
- For Simba, I created a “young” mask, and an “older” mask. For the younger mask, I made rounder eyes, no mane.
- For Nala, I created an older and younger. I sought ways to create “feminine” characteristics. Her eyes were tilted up on the outside for the older mask, for example.
The masks will be glued to the back of the baseball hats, and worn on top of the head, so eyes will be painted onto the masks.
Step 4.
Spray Paint
I probably had a good supply of leftover Christmas gold spray paint to use in this case, but other “lion” colors would be fine. You can always add definition to the base color with other acrylic paints. Thankfully, the batting accepted the paint, and helped to create the textured fur look.
Step 5.
Add Details
Take time to study eye shapes of young vs old, female vs male, wise vs naive vs evil. I also had to look into large cat noses.
Step 6.
Glue the masks to the back of baseball hats.
I was very pleased with the sturdiness of both the masks and the hats! They held through several performances of intermediate age students, and were still in great shape when I retired a few years ago.
